Here is a small tutorial showing how to turn your 3D Revit models into the .PDF format. This could be useful for collaborating on ideas, and showing potential clients your 3D model in a program they may have installed on their computers. I have read about various ways to open your Revit models with Adobe reader, but until now, none of them have worked as I wanted.
The first thing you need to make sure of, is that you have Adobe Acrobat 9 Pro Extended installed. A 30 day free trial is available here. This was the original problem I had when trying to create 3D .PDFs in the past. Unfortunately Adobe have removed the functionality from the newest version, but I'm sure it's still possible to get a copy of the software somewhere.
Once you have all the correct software installed, open up your .RVT file and follow these simple steps:
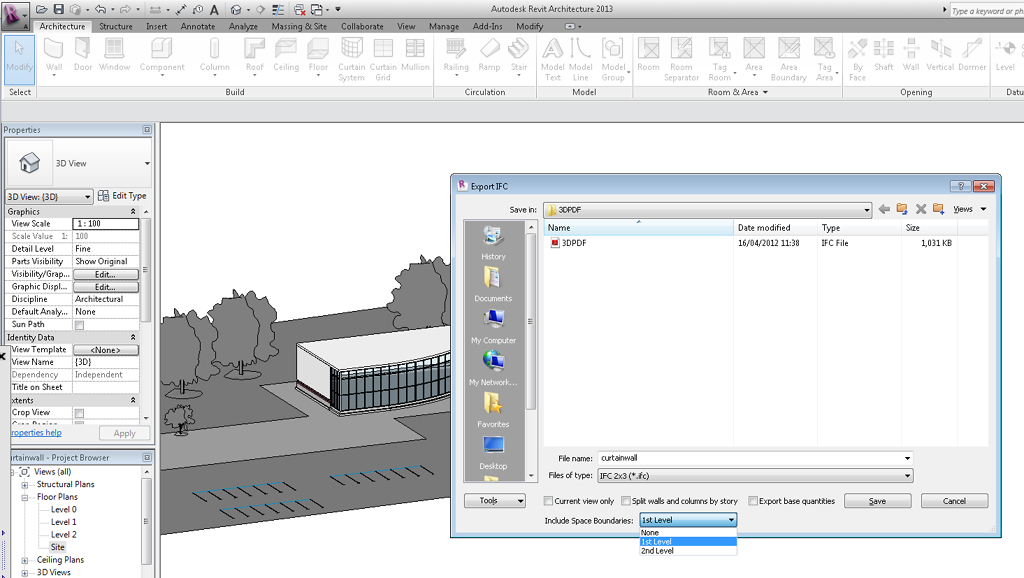
Click on the Revit icon and select Export > IFC – Here you will be given a number of different options, as shown in the image below. Make sure you select which levels you want visible as well as other options such as splitting walls and columns by story. Finally select the .IFC export type.
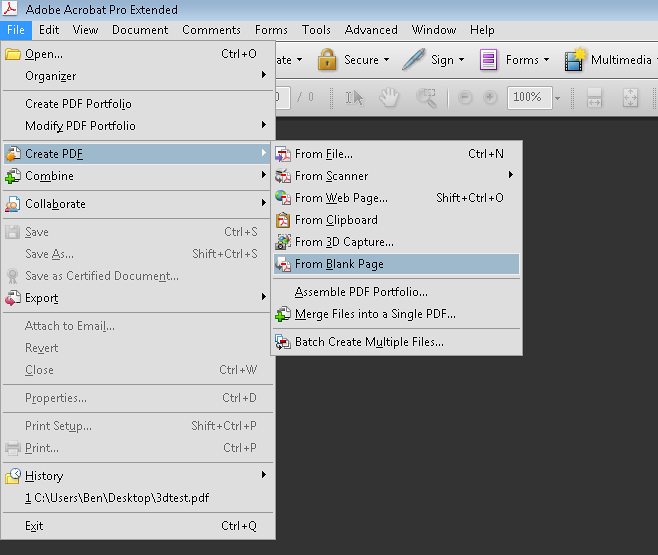
After you have exported your .RVT file into the .IFC format, you will need to open up Adobe Acrobat Pro Extended. Next you will want to create a blank page PDF as shown in the image below. File > Create PDF > From Blank page.
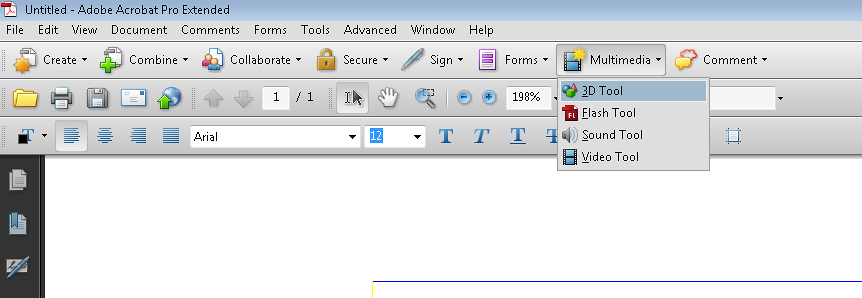
After you have done this you will need to use some of the tools in Acrobat pro insert your 3D .IFC file. To do this, simply click on the 'Multimedia' icon on the ribbon as shown below. Select the 3D Tool, and sketch a box on the blank page where you want to add your model. I would recommend drawing a large box covering the whole page, depending on the size and detail required.
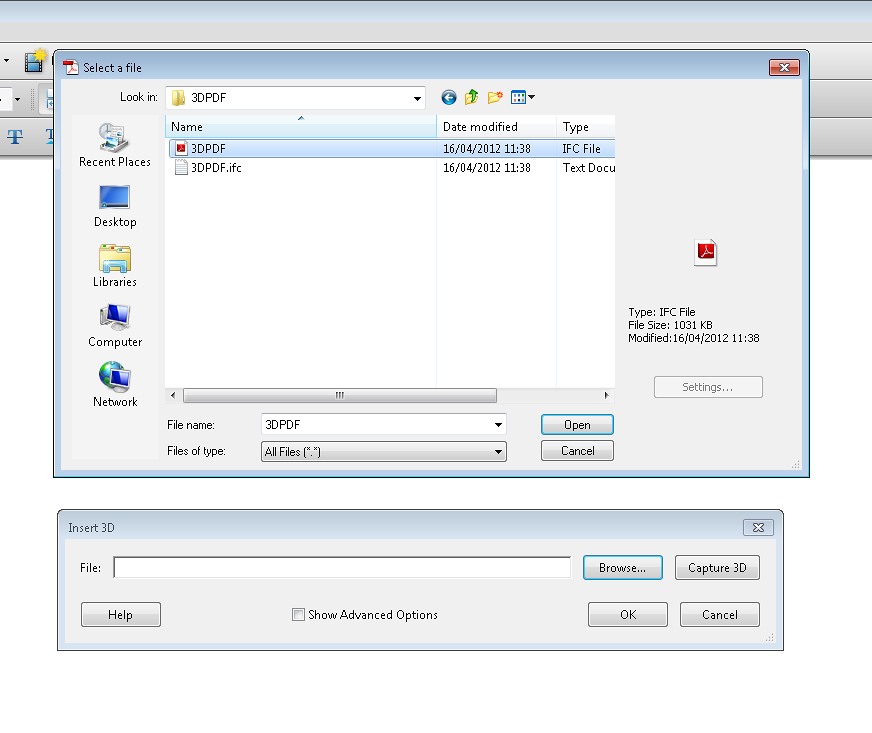
Now a pop up box will appear asking for the location of your 3D file as shown in the image below. Simply locate your .IFC file which you saved earlier from your Revit model on your hard drive and select 'Open'.
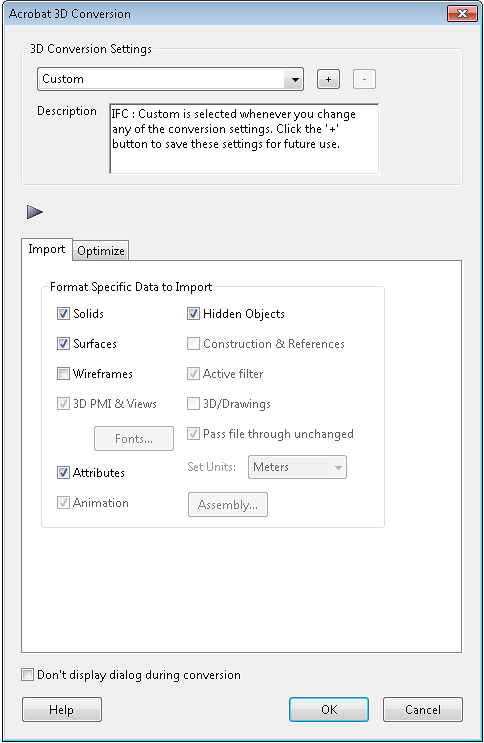
Once you have selected your .IFC file you will be able to set some custom conversion options. In this window just consider what you want shown in your model. I have choosen to remove the wireframe option as it will only be for visualisation purposes. It is also possible to increase or decrease the quality of your 3D .PDF here. This will of course influence the size of the file.
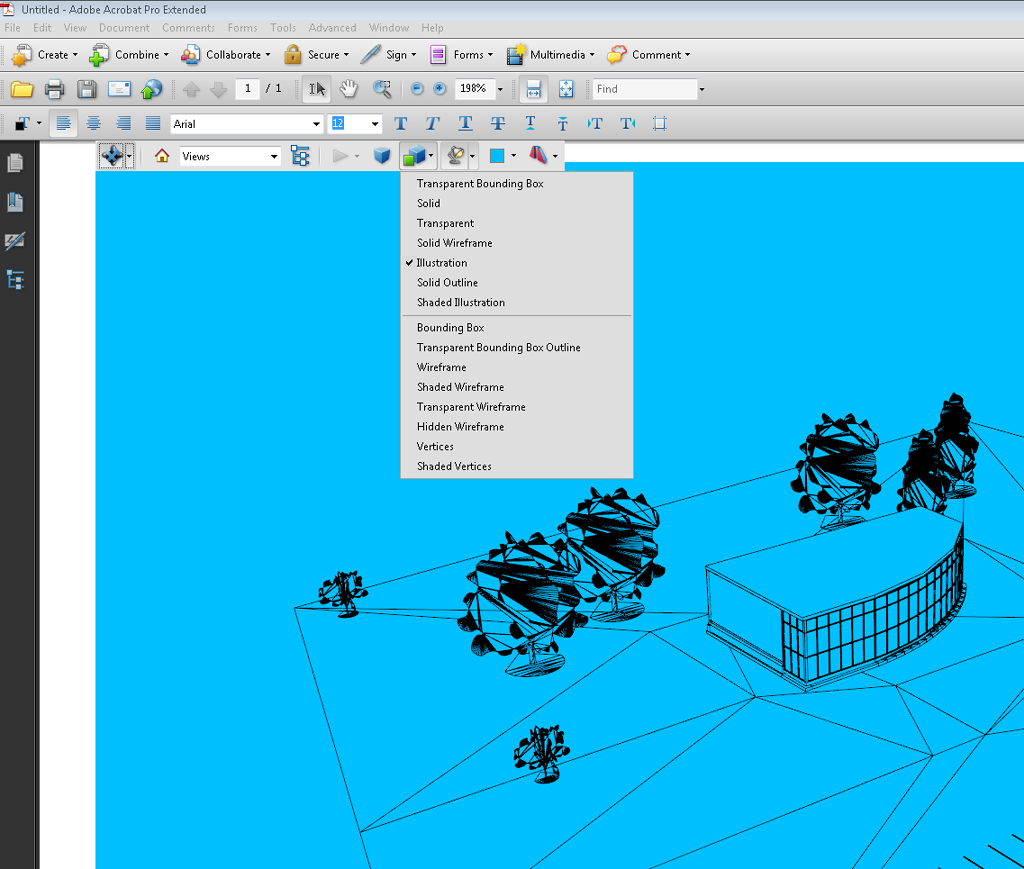
Once you have set up your conversion options, you will see your 3D model as a still image on your .PDF document. You are now able to save your original 3D Revit model as a .PDF file. Once you have saved your file, there are also other options which you can play around with. As you can see in the image below, I have selected an 'Illustration' option, and selected a background colour. For a default 3D view, it is best to select the Solid option. You will now be able to zoom, in and out of the model, as well as panning and rotating.
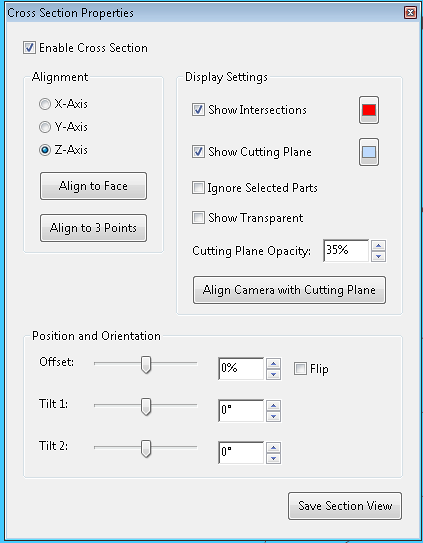
Finally, an additional option which I thought was pretty smart, is the option to change the view. As default, Acrobat 9 Pro will set cross sections on levels which you created in your Revit model. It is also possible to create new sections of the model, which could come in useful if you wanted to show furnishings or even single building elements. The image below shows the 'cross section properties' where you can modify and create new cross sections in your model.
All in all I think this is a cool, and unexpected task to be able to perform for a .PDF file. Most of the time these kind of files are associated with text and images, but this more interactive 3D version would be very useful, if only Adobe released it as standard on all their .PDF readers. I hope this post has helped someone trying to create a .PDF file from their Revit model.
Once you have all the correct software installed, open up your .RVT file and follow these simple steps:
Click on the Revit icon and select Export > IFC – Here you will be given a number of different options, as shown in the image below. Make sure you select which levels you want visible as well as other options such as splitting walls and columns by story. Finally select the .IFC export type.
After you have exported your .RVT file into the .IFC format, you will need to open up Adobe Acrobat Pro Extended. Next you will want to create a blank page PDF as shown in the image below. File > Create PDF > From Blank page.
After you have done this you will need to use some of the tools in Acrobat pro insert your 3D .IFC file. To do this, simply click on the 'Multimedia' icon on the ribbon as shown below. Select the 3D Tool, and sketch a box on the blank page where you want to add your model. I would recommend drawing a large box covering the whole page, depending on the size and detail required.
Now a pop up box will appear asking for the location of your 3D file as shown in the image below. Simply locate your .IFC file which you saved earlier from your Revit model on your hard drive and select 'Open'.
Once you have selected your .IFC file you will be able to set some custom conversion options. In this window just consider what you want shown in your model. I have choosen to remove the wireframe option as it will only be for visualisation purposes. It is also possible to increase or decrease the quality of your 3D .PDF here. This will of course influence the size of the file.
Once you have set up your conversion options, you will see your 3D model as a still image on your .PDF document. You are now able to save your original 3D Revit model as a .PDF file. Once you have saved your file, there are also other options which you can play around with. As you can see in the image below, I have selected an 'Illustration' option, and selected a background colour. For a default 3D view, it is best to select the Solid option. You will now be able to zoom, in and out of the model, as well as panning and rotating.
Finally, an additional option which I thought was pretty smart, is the option to change the view. As default, Acrobat 9 Pro will set cross sections on levels which you created in your Revit model. It is also possible to create new sections of the model, which could come in useful if you wanted to show furnishings or even single building elements. The image below shows the 'cross section properties' where you can modify and create new cross sections in your model.
All in all I think this is a cool, and unexpected task to be able to perform for a .PDF file. Most of the time these kind of files are associated with text and images, but this more interactive 3D version would be very useful, if only Adobe released it as standard on all their .PDF readers. I hope this post has helped someone trying to create a .PDF file from their Revit model.
No comments:
Post a Comment
(“Post your comments below”),